4Industry information
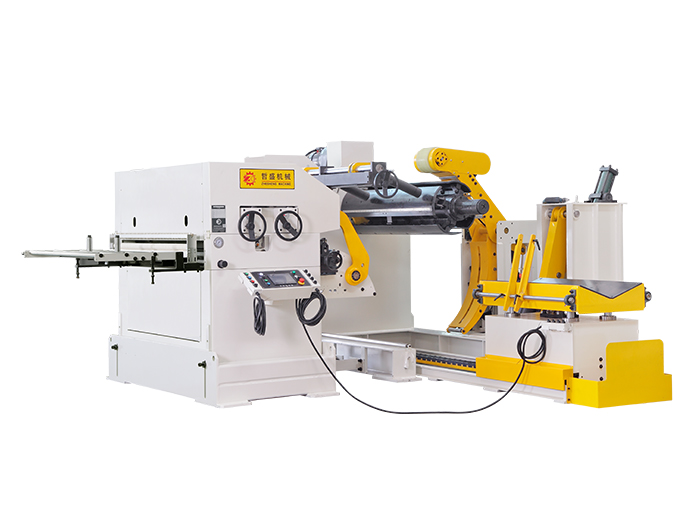
The three-in-one feeder is mainly composed of the unwinding frame part, the precision leveling part and the servo feeding part. The three-in-one punch feeder has a larger outer size than a single device, and the bulky body handling is not easy, so Sometimes it is necessary in special circumstances. In order to facilitate transportation, the three-in-one equipment will be reassembled and debugged after the parts are disassembled into the customer's workshop before shipment. When disassembling and disassembling the three-in-one feeder, first determine the need to remove the position, and then power off the equipment to ensure the safety before proceeding to the next step. What are the main components?
1. The connection part of the whole frame is aligned and flattened with four screws. When the rack is disassembled and assembled, the aerospace joint connection will be displaced. When the rack is repositioned and installed, it is only necessary to install the aviation plug at the joint to the original hole position, which is simple and convenient.
2. Install two self-made mechanical cams and cooperate with two proximity switches. These two cam lines connect the feed signal and the relaxation signal and X4 of the NCSF feeder. In addition, the machine has two signal lines. This signal line is an emergency stop line, which is output when the feeder is abnormal. It can be connected in series to the emergency stop signal of the punch. Note that the shielded cable connected to the small electrical box must not be torn off, and the encoder cable connected to the NC feeder should not be pulled at will.
3. The wire box below the rack hydraulic station does not need to be disassembled. After the disassembly is completed, pay attention to the storage of the wires. It is recommended to wrap them with adhesive tape. All parts of the machine should avoid scratches and collisions.
Three-in-one feeder installation points:
1. After the machine is transported to the customer's factory, the machines are arranged in a line, and the two joints are connected by screws. Pay attention to the same height and adjust the center line of the machine to the center line of the mold.
2. Wiring: Connect the previously removed wires one to one (according to the number tube number), pay attention to the order of installation before and after the sealing plate. Reminder: The four casings coming out of the large electrical box should correspond one-to-one by the encoder wire plug, the pulse line NC feeder motor wire and the large casing wire.
3. After all the circuits have been installed, please check again if they are properly installed and completed. After confirming, install the machine cover.
4. After confirming that the power switch of the power box control panel is in the off state, turn on the power (3 phase 380V), turn on the power switch, confirm whether it is normal, and cut off the power immediately if there is any abnormality.
5. Operate the control handle and press (Rack up) or (Rack down) to adjust the material discharge height to be level with the mold. Be careful to loosen the screws of the NC three-in-one feeder frame, otherwise the action will be invalid.
6. Then connect the feeding and loosening signal lines of the machine to the punching machine, and also connect the emergency stop line as needed.
7. After all the confirmations are normal, the three-in-one feeder can enter normal production, pay attention to safety, and regularly check and fill the lubricant.